In this week’s session, I learned how to work with audio editing using Audacity. Additionally, in a group of four, we created a fictional video advertisement.
Audio
Introduction To Audio Editing With Audacity
Ever wanted to polish your audio recordings or podcasts without diving into expensive software? Audacity is a free, easy-to-use audio editing tool that’s perfect for beginners and seasoned creators alike. With just a few clicks, you can trim audio, remove background noise, and even add cool effects. Let’s explore how Audacity can make your audio projects shine!
Activity 6: Amplify Audio With Audacity
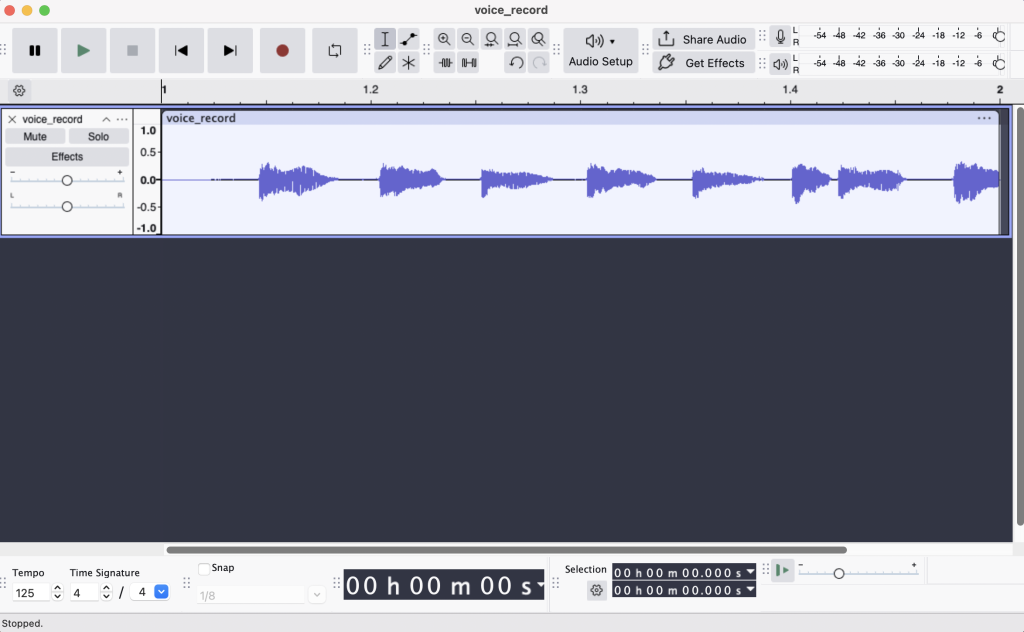
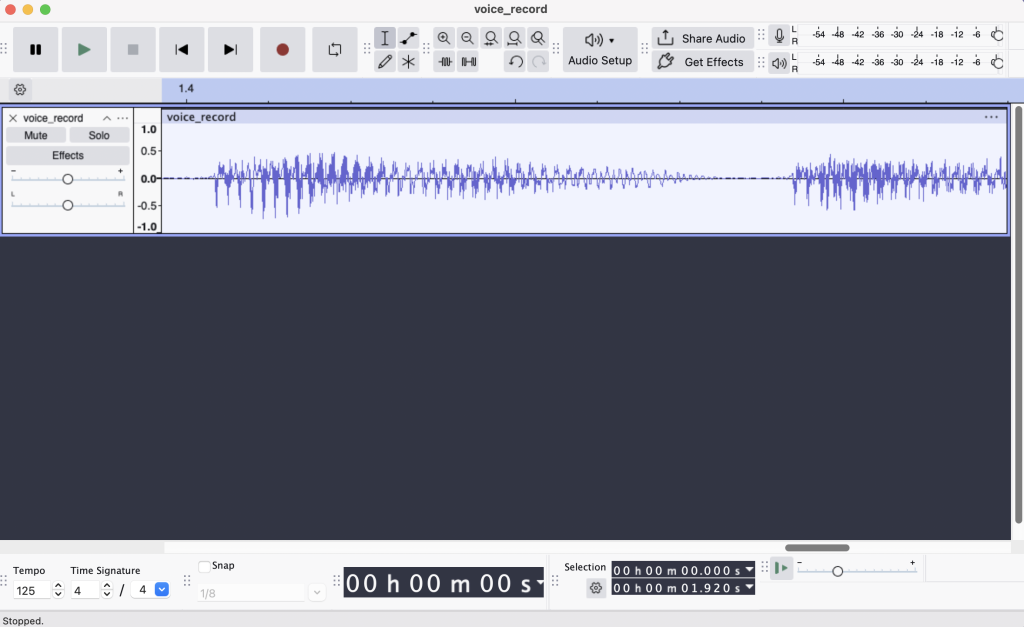
1. Upload the recorded audio to Audacity
This is what it looks innitially when I uploaded the audio to the threads. Now the audio is ready to be edited.
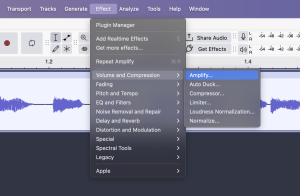
2. Amplify Function
Audio Amply function can be found in the menu (Effect > Image and Compression > Amplify). From here, we can edit dB to negative for lowering amplification and setting dB to positive value will higher up the voice amplification.

3. Low Level Amplification
Low amplification: Quiet, hard to hear, lacks clarity.

4. Medum Level Amplification
Medium amplification: Clear, balanced, easy to listen to.
5. High Level Amplification
High amplification: Too loud, distorted, uncomfortable to hear.
Activity 7: Audio Nornalization With Audacity
1. Exploring Audio Pixel
When zooming deeply into an audio waveform, you’re exploring “audio pixels,” or individual samples. Each tiny dot represents a single moment of sound captured digitally. Zooming in helps you understand how sound is constructed from thousands of these small points, revealing details like pitch, loudness, and subtle noises otherwise invisible at normal magnification.
![]()
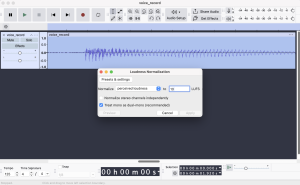
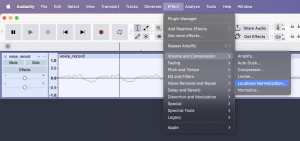
2. Normalization Functions
Audio Normalize function can be found in the menu (Effect > Image and Compression > Loudness Normalization).
Audio normalization adjusts the overall volume of your audio track to reach a consistent, optimal level without distortion. Think of it as an automatic volume boost or reduction that ensures your recordings sound balanced and professional. It’s especially helpful when combining audio from multiple sources, giving listeners a smoother, more pleasant experience.
3. Before Normalization
Before normalization, your audio might have uneven volumes—some sections sound too soft, making speech unclear, while others might unexpectedly spike, causing discomfort. Without normalization, listeners constantly adjust the volume, resulting in a distracting experience. The waveform appears irregular, reflecting these fluctuations clearly.

4. After Normalization
After normalization, your audio maintains a consistent, balanced loudness, making speech clear and comfortable for listeners. The waveform becomes more uniform, eliminating harsh volume spikes and soft, unclear sections. This results in professional-sounding audio that listeners can enjoy without constantly adjusting their volume.
Activity 8: Audio Reverb & Reverse With Audacity
1. Reverb
Audio Reverb: Adds depth and echo, making the track sound spacious and immersive, similar to being in a large hall.

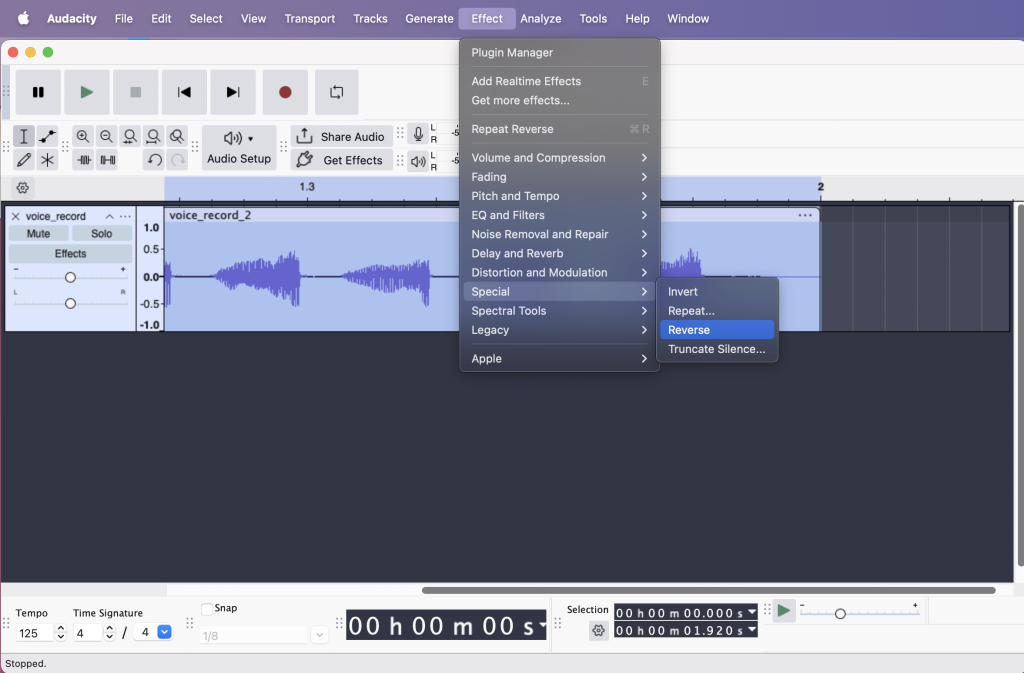
2. Reverse
Audio Reverse: Plays your audio backward, creating unique and unusual sound effects, perfect for creative projects or special effects.
Activity 9: Discoveries
Available file formats: Audacity supports formats like WAV, MP3, AIFF, OGG, FLAC, and more, each suited for different quality and file-size needs.
Waveform, amplitude, frequency:
- Waveform: Visual representation of sound showing volume changes over time.
- Amplitude: The height of the waveform, indicating loudness.
- Frequency: How quickly the waveform vibrates per second, determining the pitch of the sound.
Activity 10: Fictional Product’s Advertisement
Introducing EYEMOI, the world’s first AI-powered glasses aka your AI-Powered Smart Glass Companion, where advanced artificial intelligence seamlessly integrates with your vision through revolutionary eyewear technology.
Smart Connectivity & Personal AI Assistant
Connect effortlessly to your smartphone for enhanced control, personalized notifications, and smart features accessible through your lenses. EYEMOI’s built-in personal AI assistant is always ready, providing real-time information, reminders, and support exactly when you need it.
Automatically Capture Life’s Best Moments
With advanced emotion recognition, EYEMOI detects when you’re smiling, laughing, or simply enjoying a special moment, instantly capturing these memories for you—hands-free.
Intelligent Adaptive UV Protection
EYEMOI intelligently detects environmental conditions, automatically activating UV protection filters when exposed to sunlight or extended screen time. When UV exposure decreases, it intuitively disables the filter, ensuring a clear, vivid view with true-to-life colors.
EYEMOI—Your intelligent companion designed to enrich everyday experiences.
Advertisement Video:
TEAM 404, Middlesex University Dubai
- Zamia Ahmed Joyeta
- Arafat Ahmad Mahin Khan
- Maqsood Siddique
- Nima Dhilna
References
Audacity Manual. (n.d.). https://manual.audacityteam.org/index.html
- Export Formats supported by Audacity – Audacity Manual. (n.d.). https://manual.audacityteam.org/man/export_formats_supported_by_audacity.html
- CST1160 Lecture Slides. (2025). 01_CST1160_Media_Literacy [PowerPoint slides]. Middlesex University Dubai.
- CST1160 Lecture Slides. (2025). 02_CST1160_Media_Literacy_2 [PowerPoint slides]. Middlesex University Dubai
- EYEMOI By Team 404, MDX Dubai

